Overview
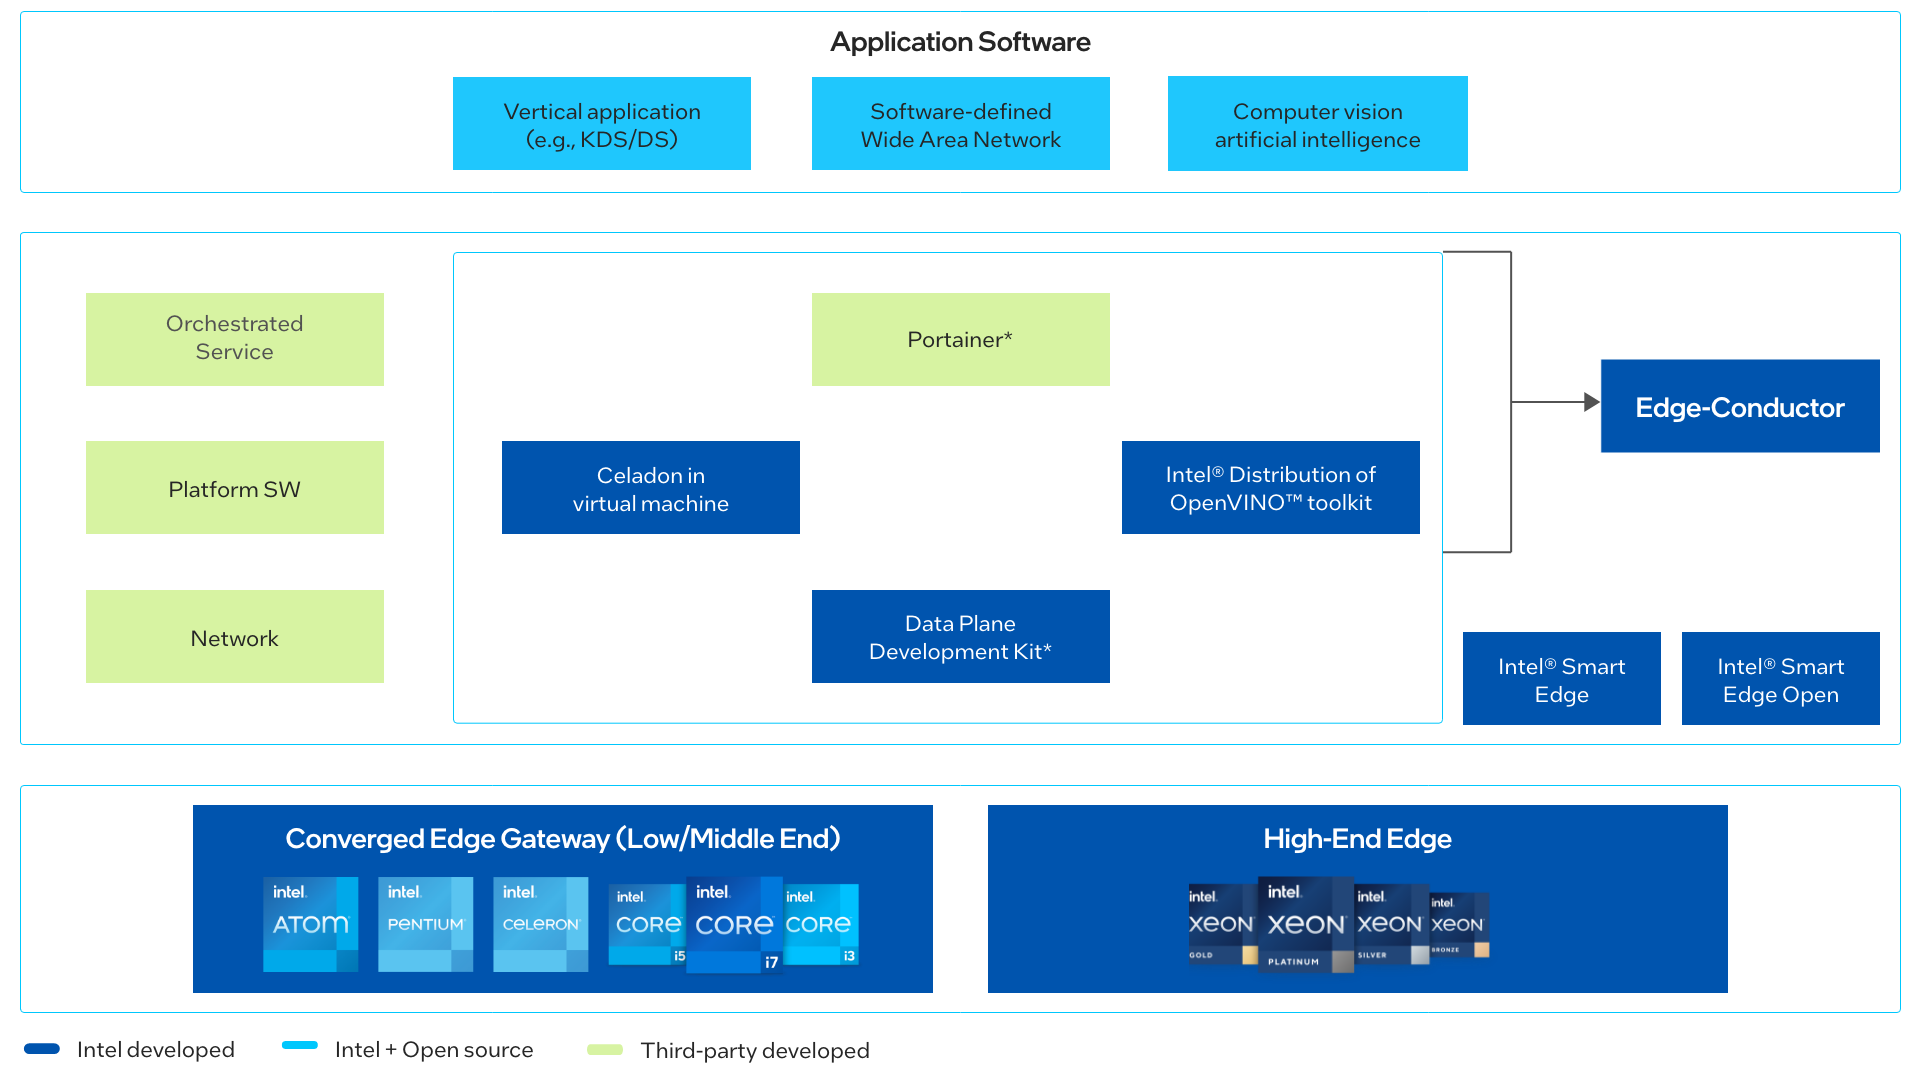
Create an edge solution for retail use cases with EdgeX*, Portainer*, the Intel® Distribution of OpenVINO™ toolkit, Celadon in Virtual Machine (CIV) and Data Plane Development Kit (DPDK*).
Port and optimize application software based on Intel® platforms, then deploy to offline stores.
Select Configure & Download to download the reference implementation and the software listed below.
- Time to Complete: 1.5 hours
- Programming Language: Python*
- Available Software:
- Celadon in Virtual Machine
- DPDK
- SD-WAN
- Docker*
- Portainer
- Intel® Distribution of OpenVINO™ toolkit
Target System Requirements
- 8th Generation Intel® Core™ processor (with fan).
- At least 110 GB hard drive.
- An Internet connection.
- Ubuntu* 20.04.3 LTS.
How It Works
The process for Reference Architecture for Edge Connectivity is as follows:
- Locate the Reference Architecture for Edge Connectivity in Intel® Developer Catalog by selecting Configure & Download.
- Upload your own application software as a Docker image to Docker Hub, then register it as a module in the Intel® Developer Catalog system.
- The package will be integrated application software and platform software, which will include the 3rd party Docker image (application software).
- Intel® Developer Catalog provides the Python download and installation script for the package.
Get Started
Step 1: Install
- Open a new terminal, go to the download folder and unzip the downloaded reference implementation package:
unzip reference_architecture_for_edge_connectivity.zip - Go to the reference_architecture_for_edge_connectivity directory:
cd reference_architecture_for_edge_connectivity - Change permission of the executable edgesoftware file:
chmod 755 edgesoftware - Run the command below to install the Reference Implementation:
./edgesoftware install - During the installation, you will be prompted for the Product Key. The Product Key is contained in the email you received from Intel confirming your download.
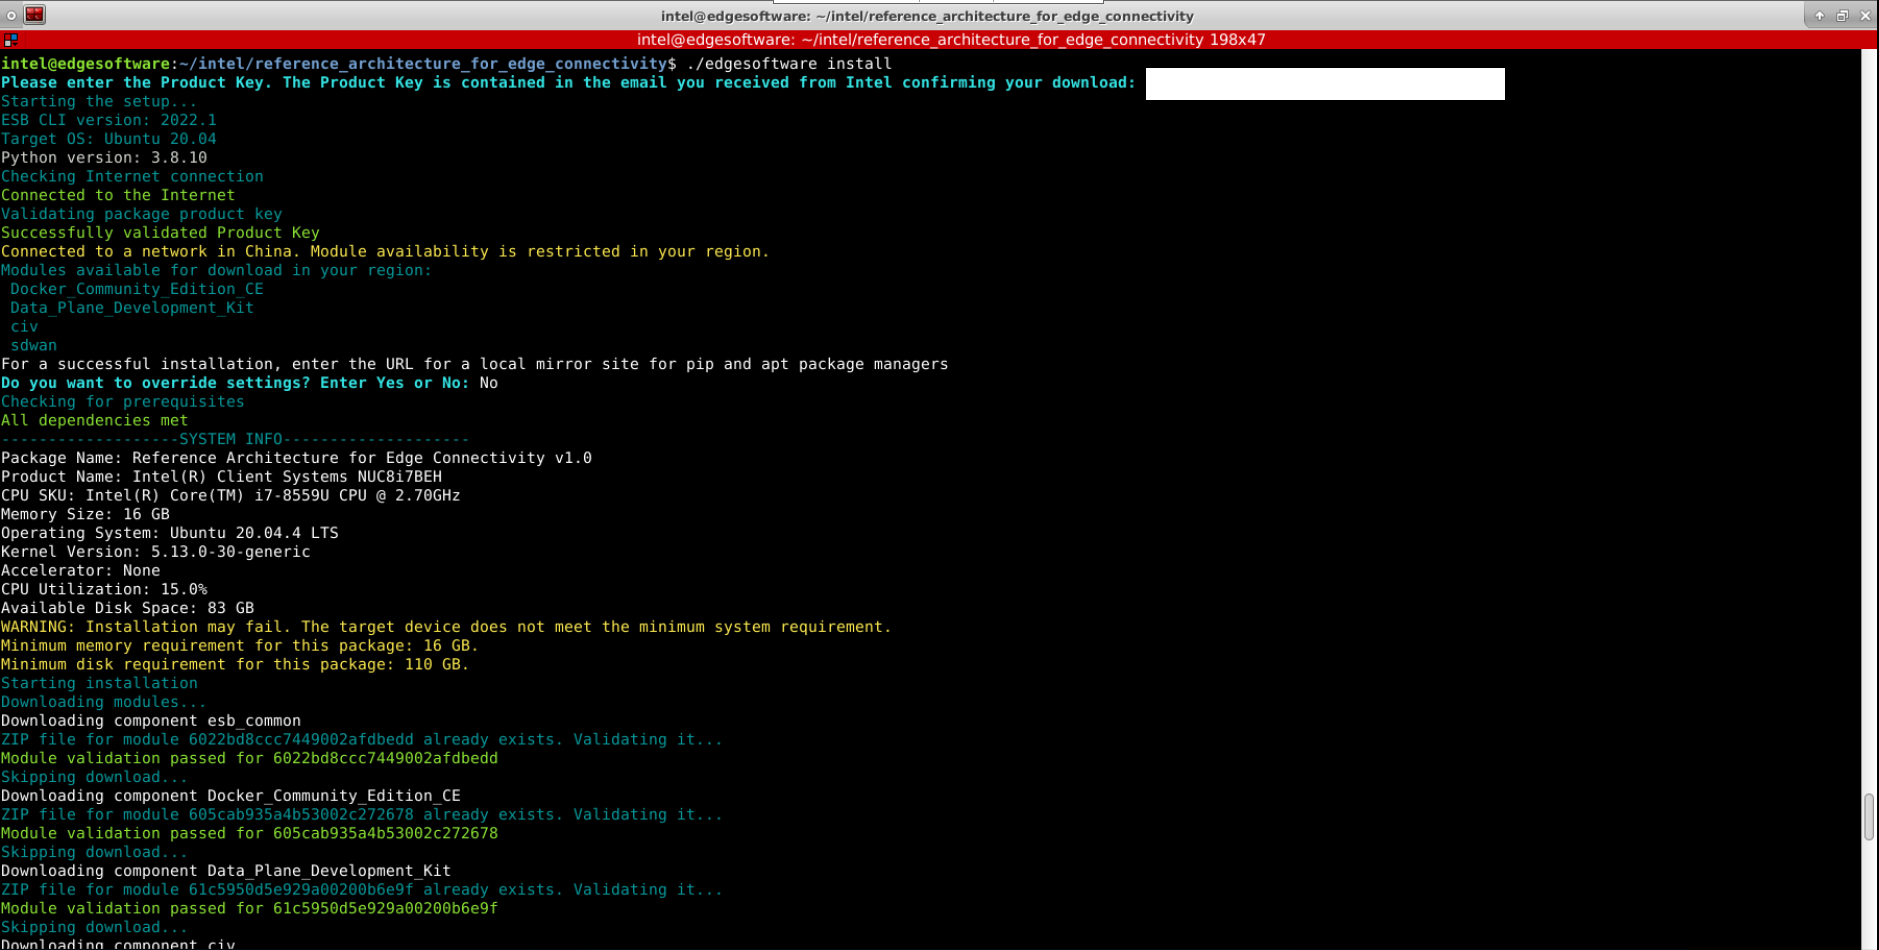
Figure 2: Product Key - When the installation is complete, you see the message “Installation of package complete” and the installation status for each module.
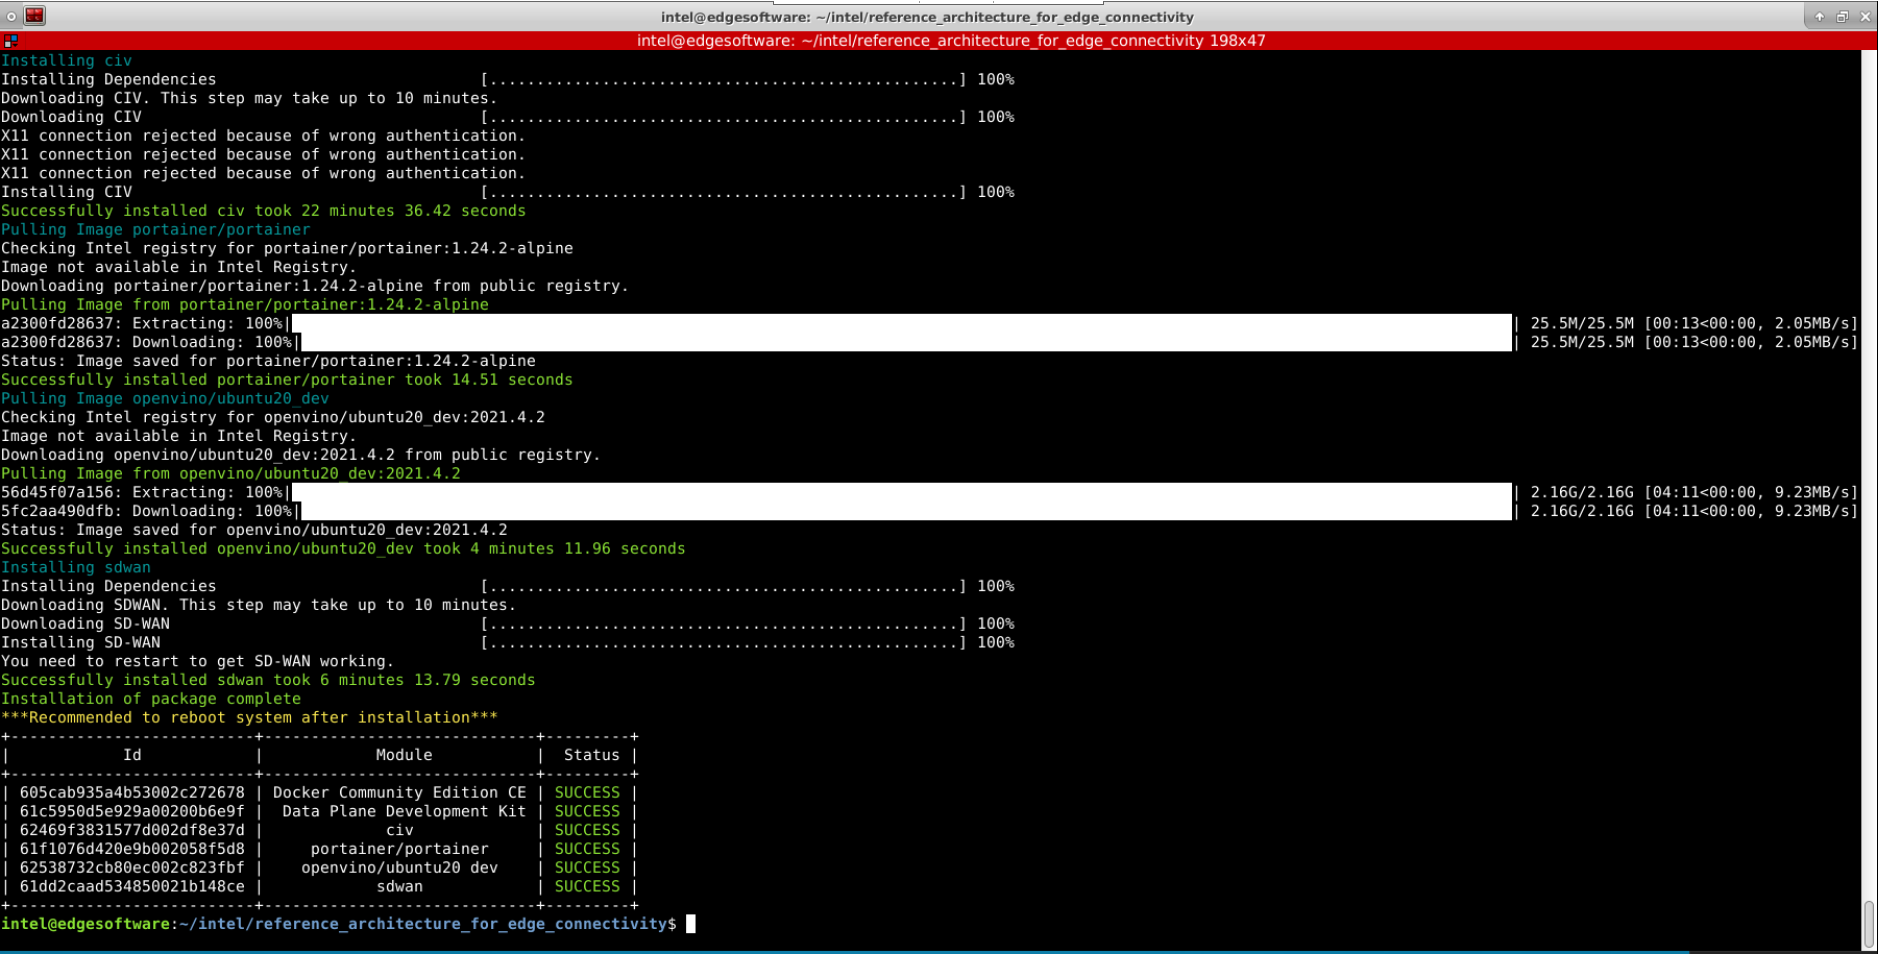
Figure 3: Install Success
Step 2: Reboot
Reboot is required for modules installed to take effect. Reboot the system to finish all the installation steps.
sudo reboot
Uninstall
- Use the following command to remove all the installed modules:
./edgesoftware uninstall -a - Run command with --help option to check uninstallation:
./edgesoftware uninstall --help
Run the Application
- Test DPDK with the following command:
cd ~/edge/dpdk/builddir/
sudo examples/dpdk-helloworld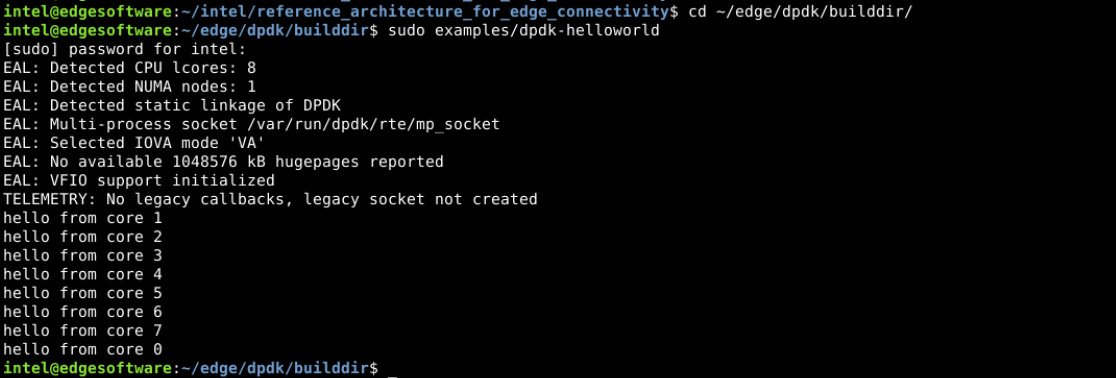
Figure 4: Results of Test - Test CIV with the following command:
cd ~/edge/civ/
sudo -E ./scripts/start_civ.sh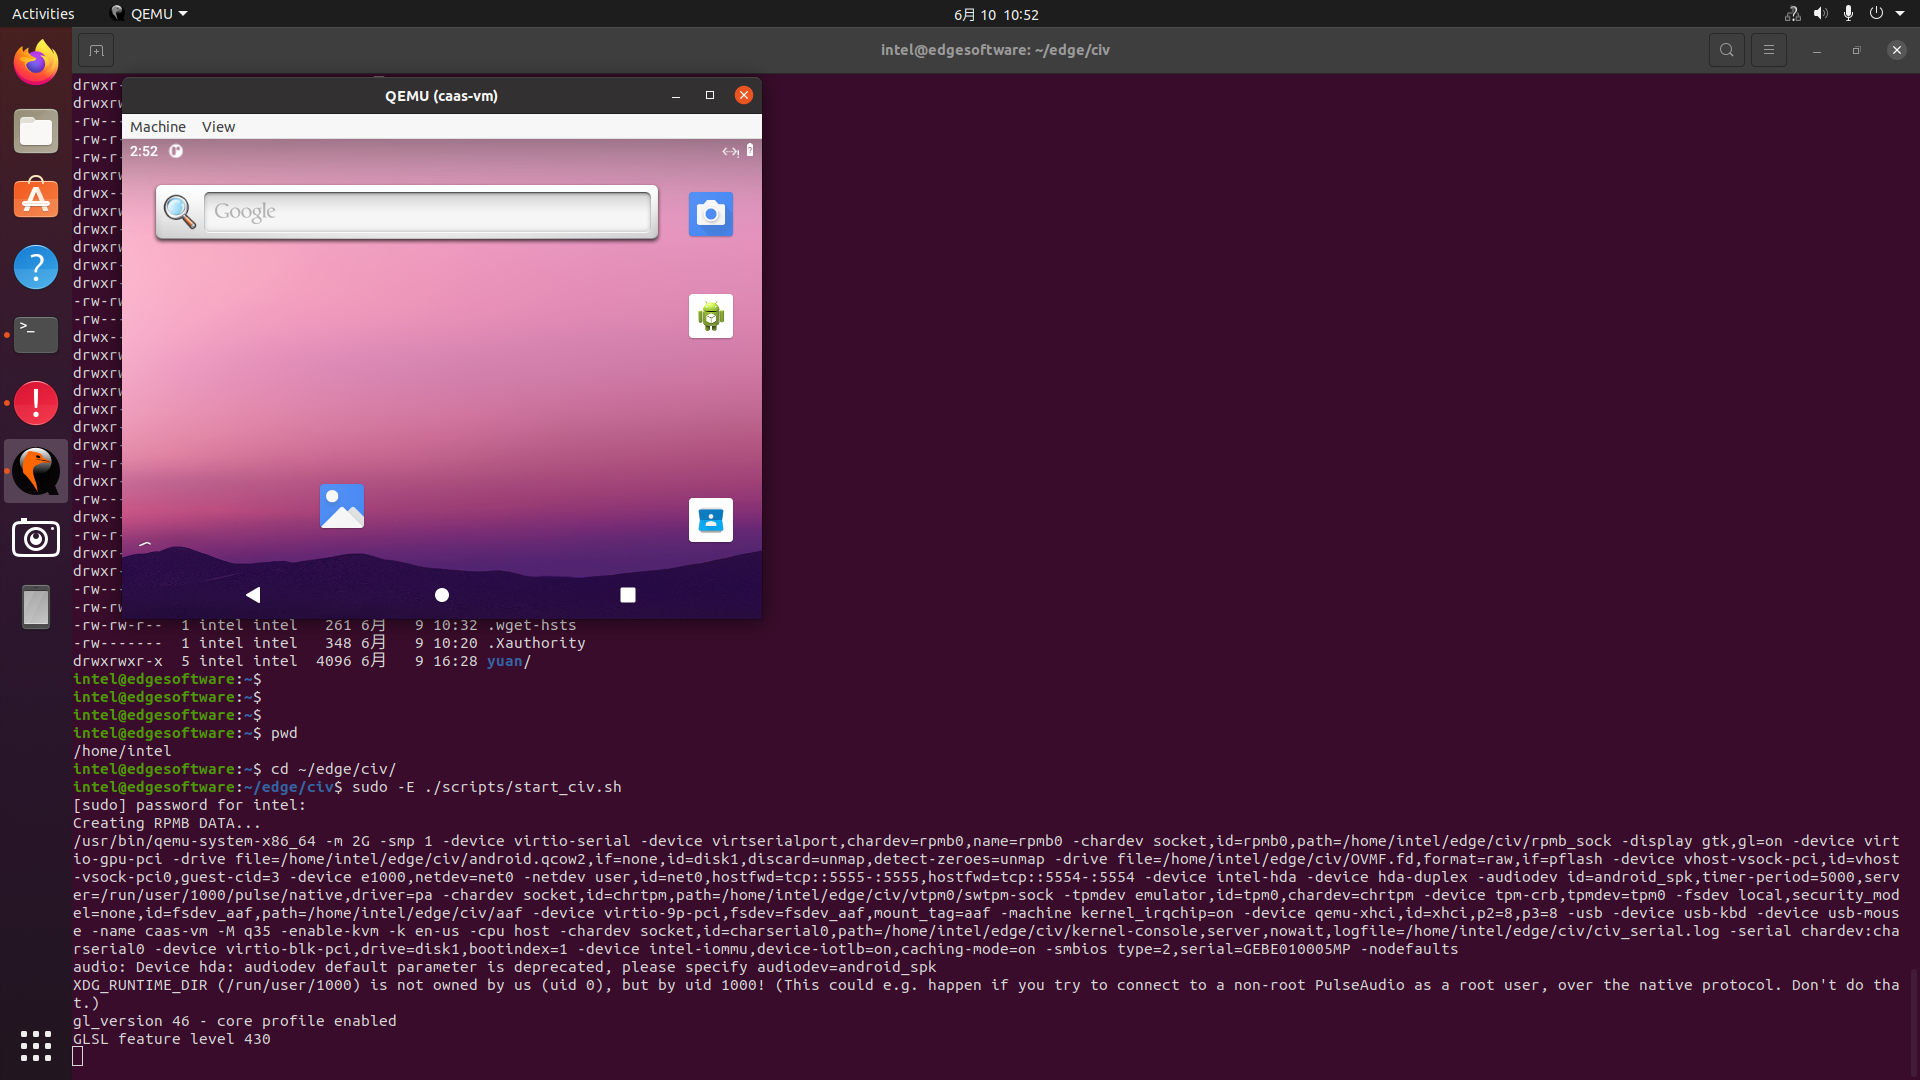
Figure 5: Results of Test - Test SD-WAN with the following steps:
- Check the neccessary information about the SD-WAN VM. Confirm it is running with the command:
sudo virsh list - Create the SD-WAN VM if it does not exist with the commands:
cd ~/edge/sdwan/ sudo virsh create 128TSSR.xml - Enter the VM using the virsh CLI:
sudo virsh console 128TSSR - Login with Username and Password:
- Press Enter to go to the VM login stage.
- Use root and 128tRoutes to login.
- After successful login, a welcome message is displayed as shown below.
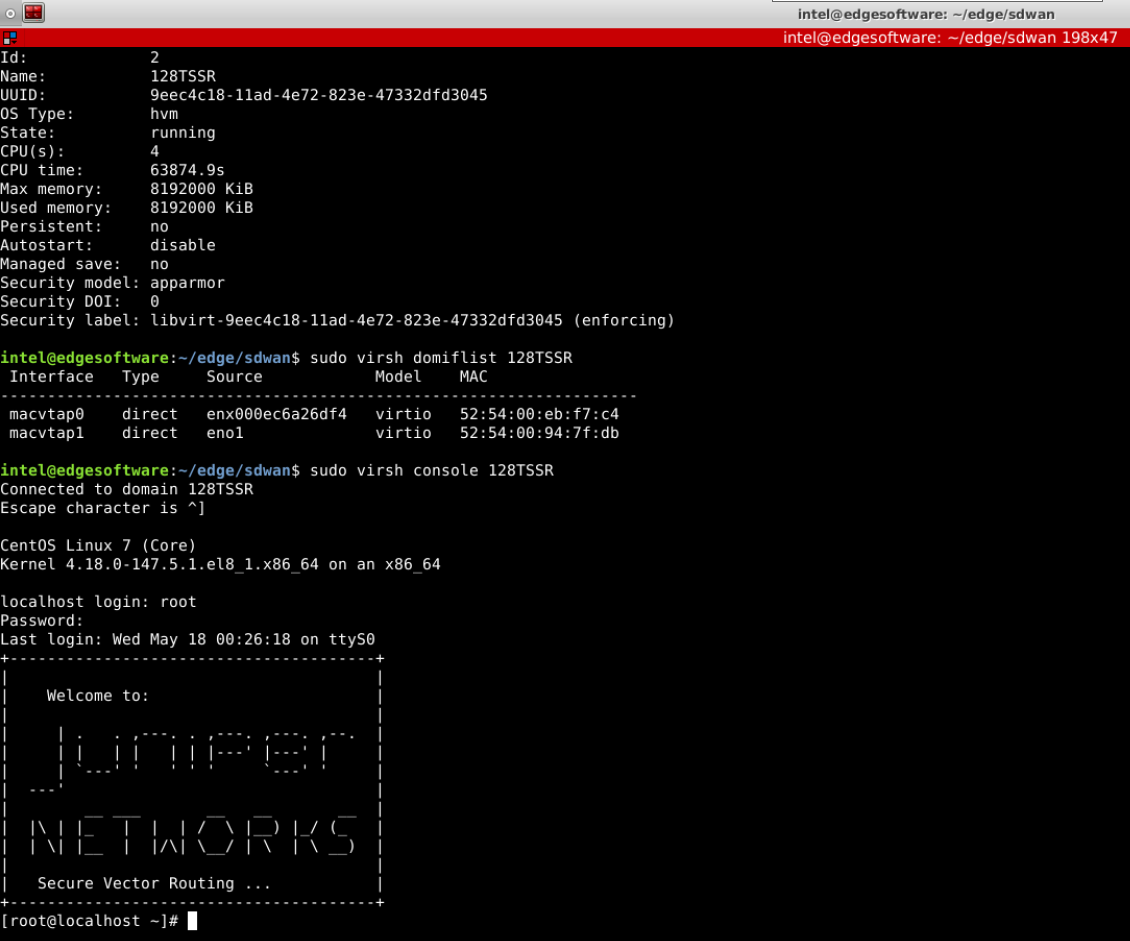
Figure 6: Welcome Screen
- Check the neccessary information about the SD-WAN VM. Confirm it is running with the command:
- Test Portainer with the following steps:
- Run the following command to start Portainer:
sudo docker run -d -p 9000:9000 --restart=always --name portainer -v /var/run/docker.sock:/var/run/docker.sock portainer/portainer:1.24.2-alpine - Use browser to login to Portainer 127.0.0.1:9000 or <Portainer-server-IP>:9000 to login if not in local host. You will see initial admin user / password set up.
- Set up the user / password and click Create user button to log in.
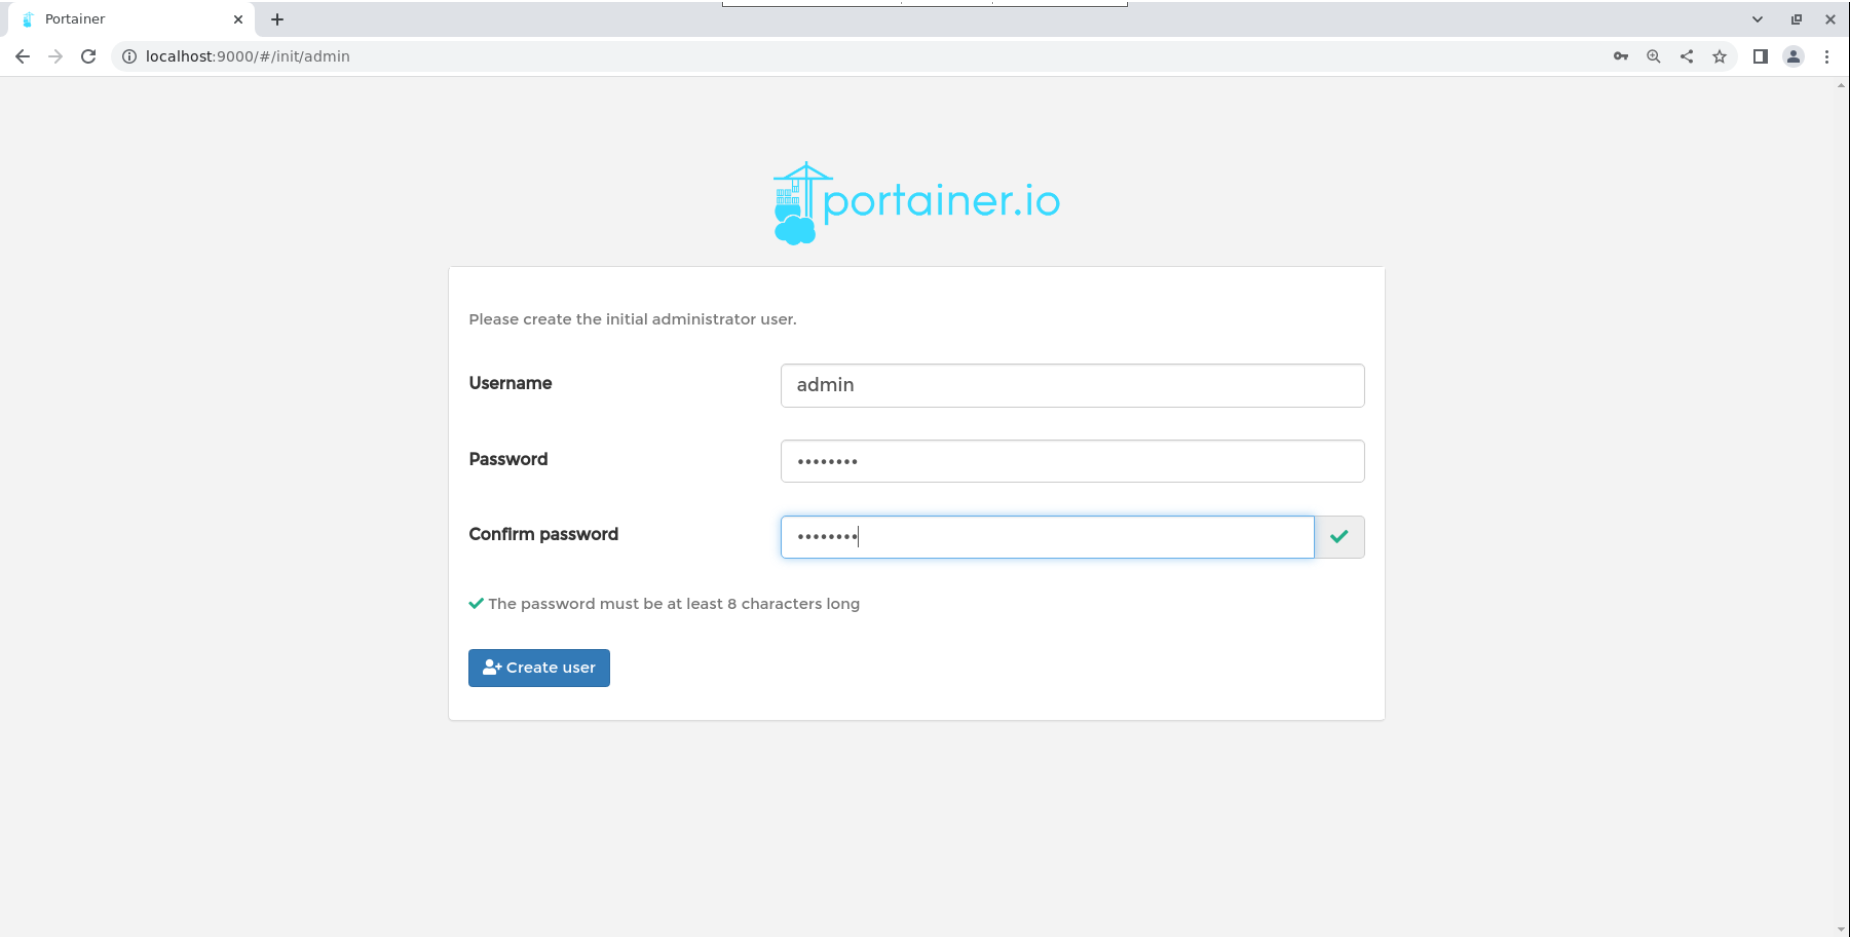
Figure 7: Portainer Login - Set Portainer mode as Local mode and click Connect to see the management page.
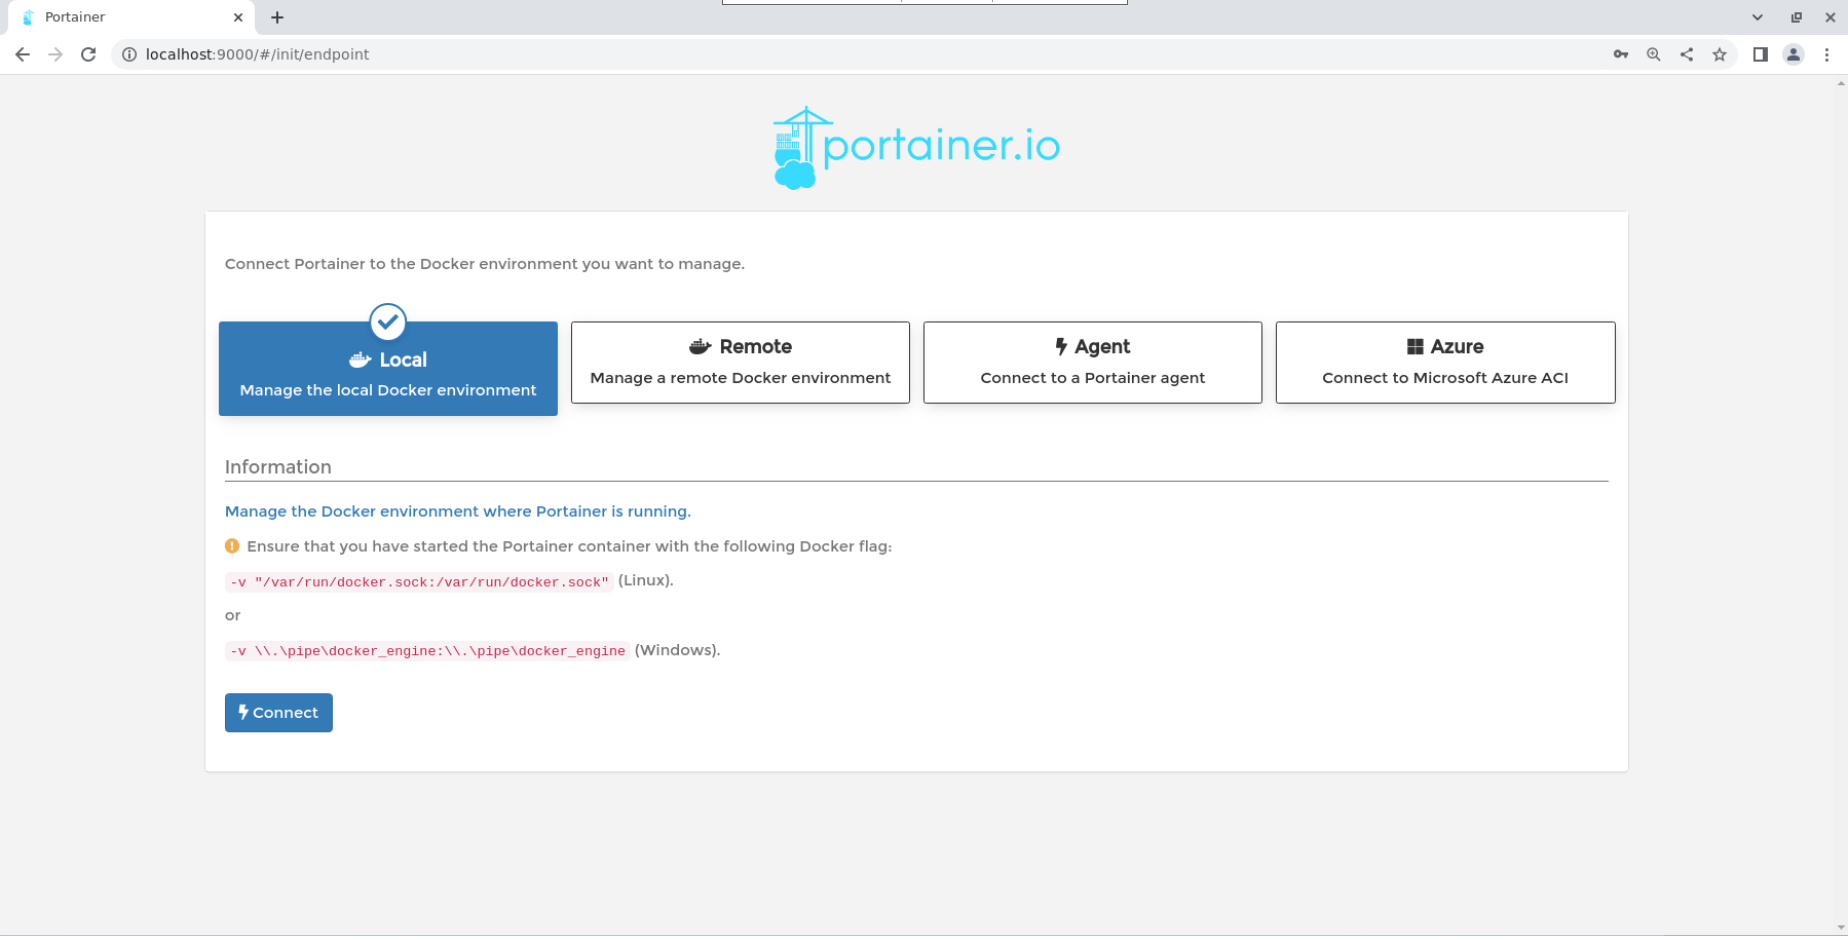
Figure 8: Select Local to Connect
- Run the following command to start Portainer:
Build Intel® Distribution of OpenVINO™ toolkit Demo
- Start Intel® Distribution of OpenVINO™ toolkit container with -u root with the following command:
docker run --rm --name openvino_demo -dit -u root openvino/ubuntu20_dev:2021.4.2 - Enter the Docker container:
docker exec -ti openvino_demo /bin/bash - In the Docker container, install building prerequisites:
apt update && apt install -y make - In the Docker container, build Intel® Distribution of OpenVINO™ toolkit demos:
cd /opt/intel/openvino/deployment_tools/open_model_zoo/demos/ && ./build_demos.sh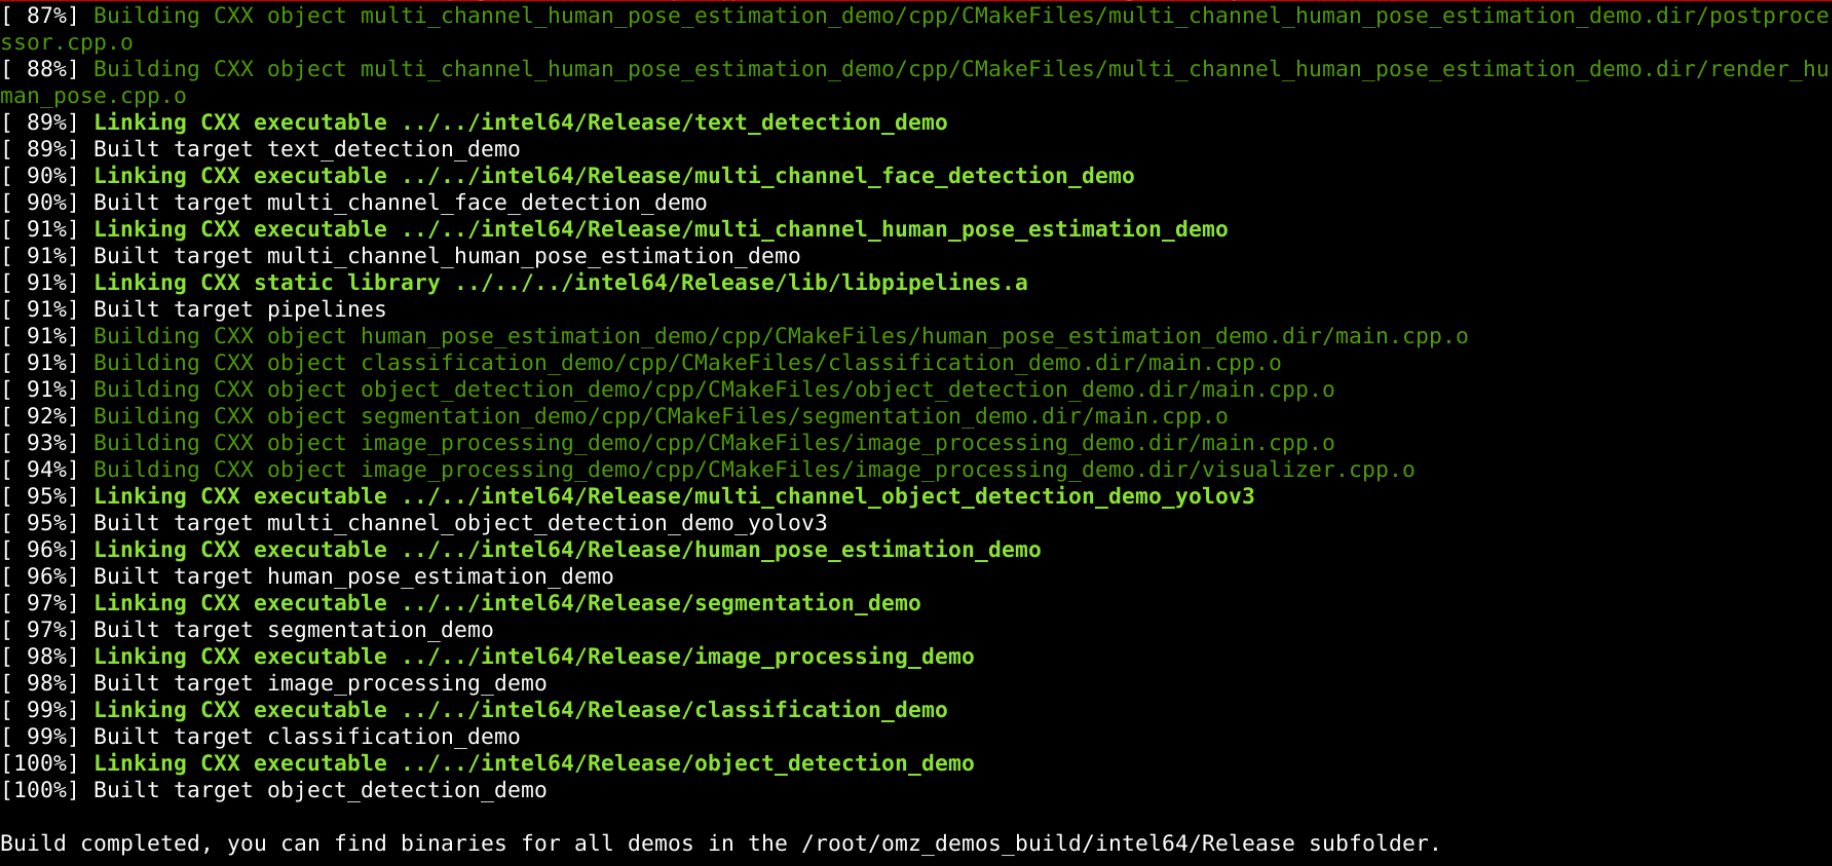
Figure 9: Building Demos - Download models via model downloader (configure the proxy if you are behind a proxy):
cd ~/ && mkdir -p models && cd models cat /opt/intel/openvino/deployment_tools/open_model_zoo/demos/human_pose_estimation_demo/python/models.lst > model.lst -
Download models listed in the model list file:
python3 /opt/intel/openvino/deployment_tools/open_model_zoo/tools/downloader/downloader.py --list ./model.lst
Figure 10: Downloading Models
- Zip the intel model folder.
tar -cvzf intel.tar.gz intel/ -
Open another terminal from Host machine and create a folder for use later.
mkdir -p ~/demo-openvino cd ~/demo-openvino -
Copy everything from dev images to Host and unzip the tar files.
sudo docker cp openvino_demo:/root/models/intel.tar.gz ./ sudo docker cp openvino_demo:/root/omz_demos_build/intel64/Release/human_pose_estimation_demo ./ tar zxvf intel.tar.gz -
Insert a USB Camera to machine before running the demo.
- Enable xhost to display the output preview in this demo:
xhost + - Use the following command to fire up Docker container with mounting local models and apps on the container and run the demo on CPU.
Note: Replace <USER> with your username.
sudo docker rm openvino_demo
sudo docker run \
--device=/dev/dri:/dev/dri \
--device=/dev/video0 \
-v /etc/localtime:/etc/localtime:ro \
-v /tmp/.X11-unix:/tmp/.X11-unix \
-v /home/<USER>/demo-openvino:/root/demo-openvino \
-e DISPLAY=unix$DISPLAY \
-e GDK_SCALE -e GDK_DPI_SCALE \
-u root \
--name openvino_demo openvino/ubuntu20_dev:2021.4.2 \
/bin/bash -c \
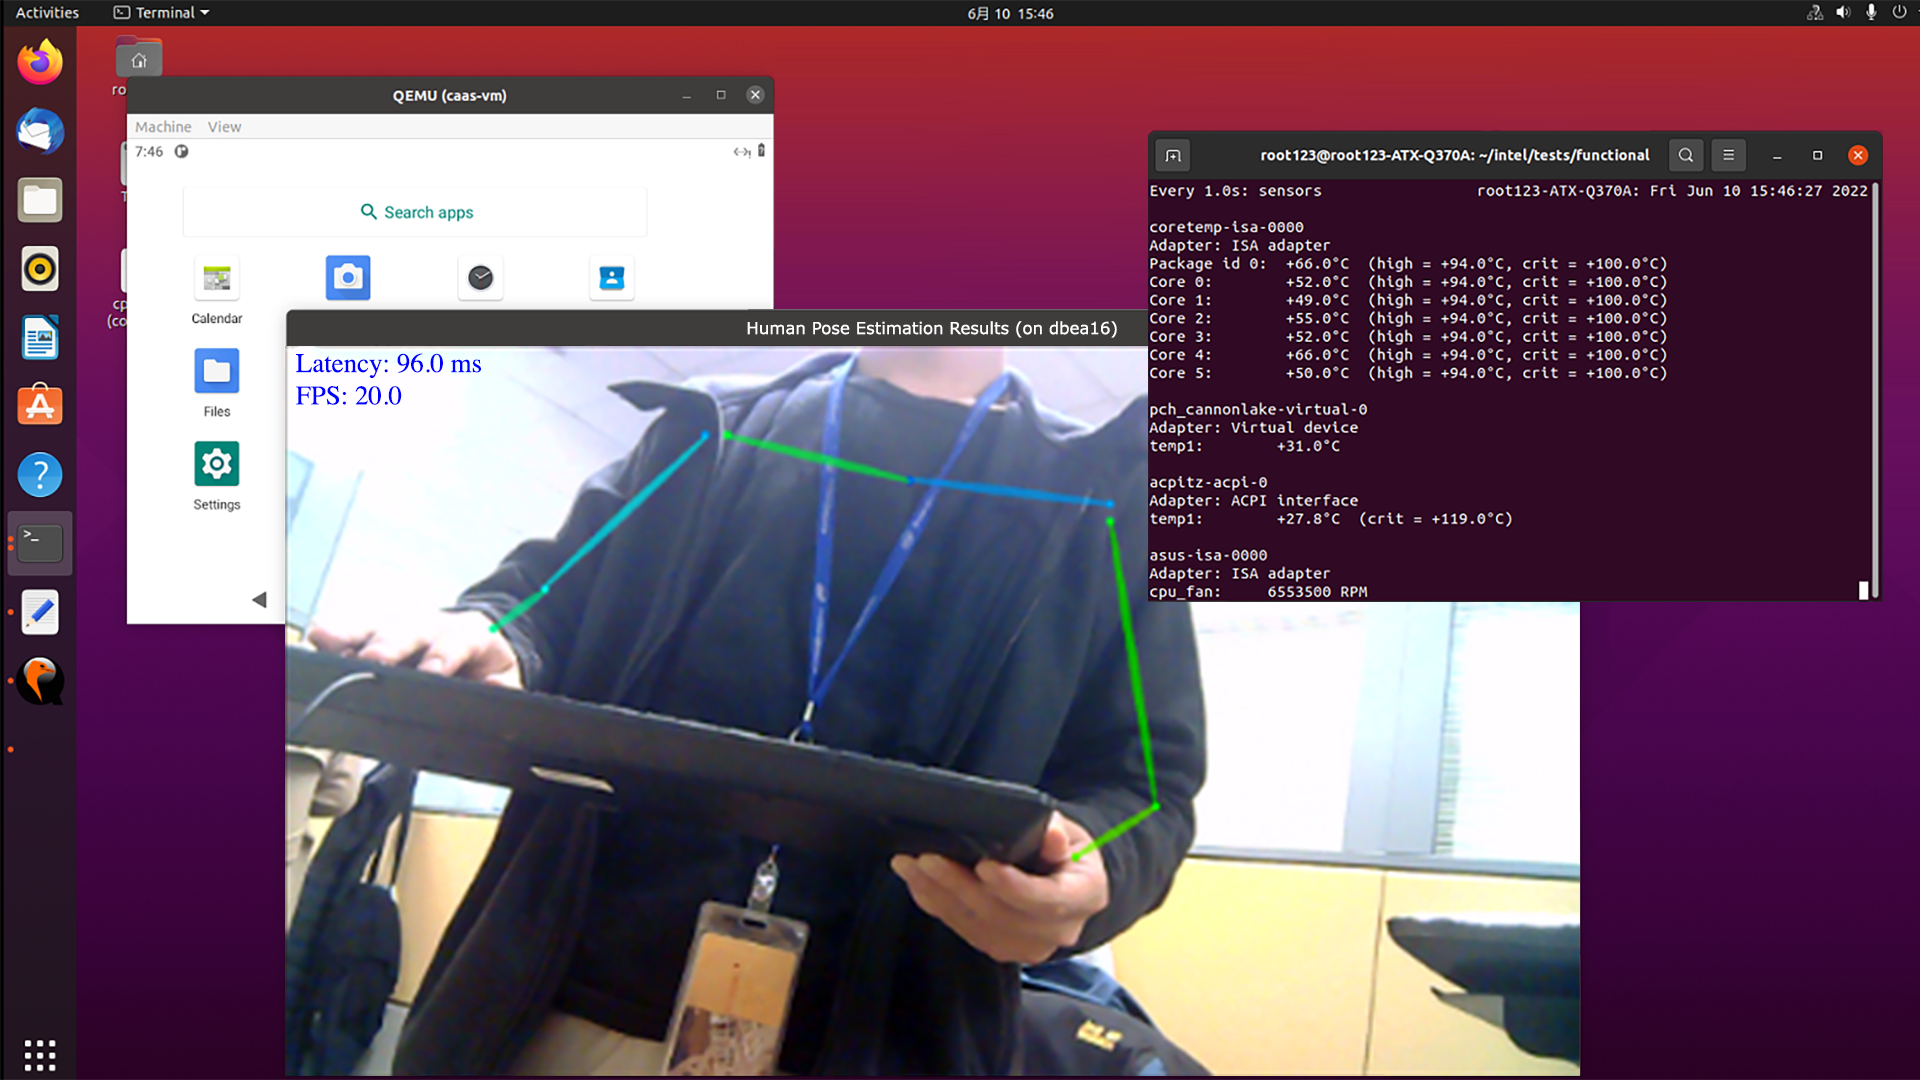
"source ./bin/setupvars.sh && /root/demo-openvino/human_pose_estimation_demo -i 0 -m /root/demo-openvino/intel/human-pose-estimation-0001/FP16/human-pose-estimation-0001.xml -d GPU -at openpose"
Summary and Next Steps
You have checked all the installed components and tested that they run with the steps above.
As a next step, run your own workloads based on these components, for example, install and run Android APP in Celadon, run an application that uses DPDK, using Portainer to manage the containers, or run SD-WAN in a virtual machine.
Learn More
To continue learning, see the following guides and software resources:
Known Issues
- Docker will not be removed automatically during uninstallation, which is how it is designed. You can removed Docker manually instead.
- The Android* launcher background changes from color to black at the second CIV boot.
Support Forum
If you're unable to resolve your issues, contact the Support Forum.
"