Flashback
The earliest studies on the use of virtual reality (VR) in exposure therapy date back to the early 1990s—yes, way back then! Surprisingly, much of the VR rush seems to streamline toward gaming, social networking, and collaboration applications, with little consideration for the therapeutic applications of VR. We are guilty of hopping on the figurative bandwagon too.
We all know people who have had a not so good first experience with VR. Our experience with producing our first VR application was pretty similar; it was a walkthrough of an industrial premises for one of our long-term customers to whom we provide training support. Needless to say, a lot of us displayed signs of mild stress—bouts of drenching perspiration, increased heart rate, dizziness and disorientation, and so on—side effects of going through a VR experience in production.
Cut to today—we can review a VR application at any stage of production without much stress. That’s why we were sold on the concept of virtual reality exposure therapy (VRET) to treat acrophobia. And it is worth considering—a sizeable population goes through a similar dissonance to what we went through, but in reality (as opposed to VR). The biggest flaw in our first-hand experience, though, was that none of us were clinically suffering from any kind of condition. Yes, some of us suffer from motion sickness, but none by clinical definition. So, we spent some time researching the scientific basis, if any, to develop a demo VRET application when we teamed with Intel, and as mentioned earlier, we were surprised how historic and well-studied the subject is.
Genesis of VRET
Exposure therapy can be described as “exposing the patient to a hierarchy of feared stimuli, whereby the fear will first increase, after which habituation will occur and the fear will gradually diminish,” (Bouman, Scholing & Emmelkamp, 1992).
With that, it’s easy to connect VR (virtual reality) with ET (exposure therapy). To state a few reasons:
- Since VRET can be executed in a psychotherapist’s clinic, there is a guarantee of the patient’s safety and privacy.
- The psychotherapist has direct control over the patient’s experience.
- Besides hardware procurement, and the costs of developing and editing the VRET application (if required), there are almost no other costs.
- Therapy sessions can be available around the clock, since setup is easy and negligible.
We were aware that the medical fraternity is already using VR for ET—a recent example being VRET to treat veterans and first responders for PTSD—it was unexpected that pioneering studies were conducted as early as 1993, and as we would benefit, it was for acrophobia. You can purchase the literature on the first study, or you can read a similar pilot, which includes a synopsis of the original.
What caught our attention from the pilot article, besides the scientific and technical specifications, was the following excerpt:
The worlds were displayed using I-glasses from virtual-io. This Head-mounted display (Hmd) Has an integrated three degrees of freedom tracker (Rotation only). The hmd has a very narrow field of view, only 30 degrees, and displays in a low resolution of 180,000 pixels. When wearing the hmd, the wearer could still see a lot of the real environment. To remedy this, a piece of cloth was placed over the visor, blinding the subject to all but the virtual world.
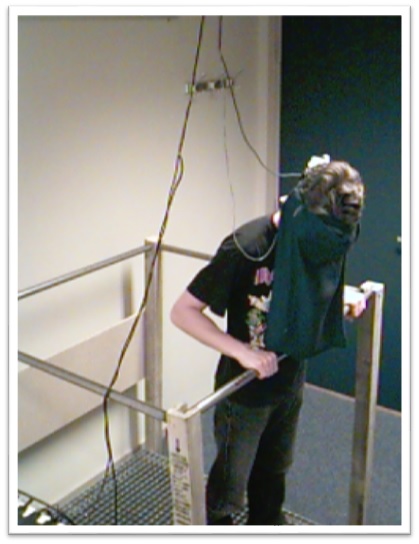
Image 1. A user in the Schuemie et al pilot VRET setup (source: published pilot study).
This motivated us to go ahead with the demo; these researchers identified the potential back in the day when even technology didn’t support their ideas.
The resolve
From our research we arrived at two points to consider when designing our demo application.
- Use case considerations: The application’s designs and features at all times should be made with the acrophobic patient in mind; that is, we need to make the user as comfortable as possible, and through our application gradually reason that comfort and safety can be one and the same.
- Realism: The exposure that the user attains in the VR application should be directly transferable to real-life scenarios, preferably subjective to the user’s regular life. This calls for high realism.
Tools for Adventure
The following are the specifics of the tools we used on our adventure:
- Intel® Core™ i7-8700k processor
The jump from 8 cores in the previous generations to 12 cores in this generation, the significant improvement in the fabrication architecture, and the added juice from its overclocking abilities; there was no way we could build our first experiment with VRET without these.
But don’t go by our word; check the complete specification list and compare it to other Intel® processors.
- NVIDIA GeForce* GTX 1080
It’s our opinion, but we find this to be the most value for the money, besides complementing the Intel Core i7-8700k processor as the best for VR, in our experience. Also, we’ve noticed how efficiently the GTX 1080 handles 4k gaming.
- Oculus Rift* and Touch (hardware)
The simple and quick set up and the comfort that we noticed many of our people have in using the controls (Touch) made this a simple choice.
- Oculus Integration for Unity* SDK 3.4.1
This is a mandatory selection if Oculus is the chosen hardware. However, the level of documentation available for the Oculus and this SDK, and the flexibility in the SDK itself make this a convenient choice.
- Unity Editor (version 5.6.4f1)
Though this isn’t the latest version, given our minimal requirements for this demo, we didn’t feel the need to move to a higher version or to the massive platform servicing Unreal Engine* 4 or Crytek*. We also recommend Unity, since it is easier to learn, experiment, develop, and deliver. However, this could be a matter of personal choice.
- Microsoft Visual Studio* Express, 2017
As C# is our primary scripting language, to us Microsoft Visual Studio Express is one of the most seamless and responsive integrated development environments that can keep pace with our VR experimentation requirements. Honestly, we have used this in most of our VR and gaming projects too, so we’ve developed a comfort with it.
Setting Forth
Given the design considerations arising from our research, we froze the following flow:
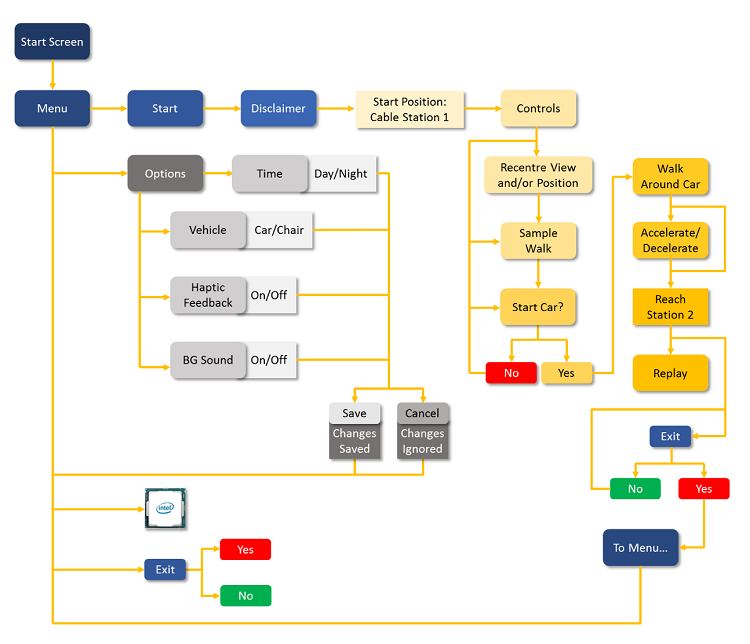
Figure 1. The demo application's flow.
A cursory look at the flow will tell you that this is a rather basic application and can include many more features. However, for the sake of this demo we have limited the VR experience to a cable journey from point A to point B, with sufficient controls to the user. Key aspects of this design are discussed in the next section.
We developed this application for the following end-user specifications:
- Intel® Core™ i5-6400k processor, any 6th generation processor, equivalent or higher
- NVIDIA GeForce GTX 970, equivalent or higher
- 8 GB RAM
- 1 GB free space
- Oculus Rift and Touch
- Oculus App Version 1.20.0.474906 (1.20.0.501061)
- Windows® 10
Given these minimum requirements, we couldn’t deploy the best that the Intel Core i7-8700k processor can run—our application almost manages to use four cores. However, using the Intel Core i7-8700k processor during production was a treat. We averaged at around 30 percent CPU usage, which allowed us to multitask to the tee while also saving 40 percent to 50 percent of our time. The GTX 1080 helped us with loading true-to-scale models and terrains, while also effectively complementing the Intel Core i7-8700k processor in rendering the model, heavy particle systems, and high number of 4k and 8k textures, while also consistently providing a frames per second (FPS) of around 45.
Using Unity, a component-based and still flexible engine with an easily accessible community and documentation, our demo’s flow could be easily modularized for a better production turnaround while still making it a seamless integration and experimenting tool with more stress on experimenting, since developing a VRET application had us playtest each and every feature, value, and component time and again.
Special Powers
Back to VRET—we were specific that at no point would our VRET move beyond the resolve of our use case considerations and realism. That is to say, the Internet is replete with inspiration and guidance on designing entertaining VR experiences, which led to some deviations whenever the team sat down to brainstorm. Here’s a fictitious scenario as an analogy:
We can’t blame Mr. Doe. That may be tempting, but not applicable.
Starting the experience versus starting the therapy
Let’s recollect the first time you sat in the driver’s seat—the feel of the steering wheel, the driver’s seat, your feet on the pedals, and the gear at arm’s reach. Most of all, adjusting to a new view of the road through the windshield, and the rear- and side-view mirrors; it was just too much to absorb, wasn’t it? Let’s take that memory and add a fear of cars zipping past you; an inexplicable level of fear.
That’s just beginning to describe how an acrophobe might feel in a virtual environment.
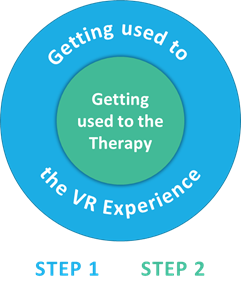
Figure 2. Requirements of a VRET experience.
Our target group not only has to be used to experiencing VR, but also needs to check their altitude-perception senses (vision is only the primary sense). That’s why the users’ start position needs to be such that they can try out their VR controls first, and once they are ready, start with their VRET. To this effect, we assigned the start position—or the user’s position when the experience begins—safely away from the railings of the cable station, and not inside the car or chair itself. So, once the controls are explained, users have an opportunity to try it out themselves. Then, users can start the therapy as a matter of choice. Speaking of choice…
Vehicle selection
Before users begin their experience we allow them to define certain features of their experience. We assume our target group is new to VR; even if they are familiar with it, they may have stayed away, given their phobia. Allowing the user to select key features instils a sense of choice and control at an early stage. The user can choose from certain options that will variate their subjective experience. However, a key inclusion is the vehicle selection.
The basis of any exposure therapy is the graduation of exposure. In this application, we bring about such graduation through the vehicle, providing two grades of exposure—the lesser intense and perceivably more secure cable car, with six degrees of freedom so users can look and walk around, and the relatively higher-intensity cable chair, with three degrees of freedom so users can only look around.
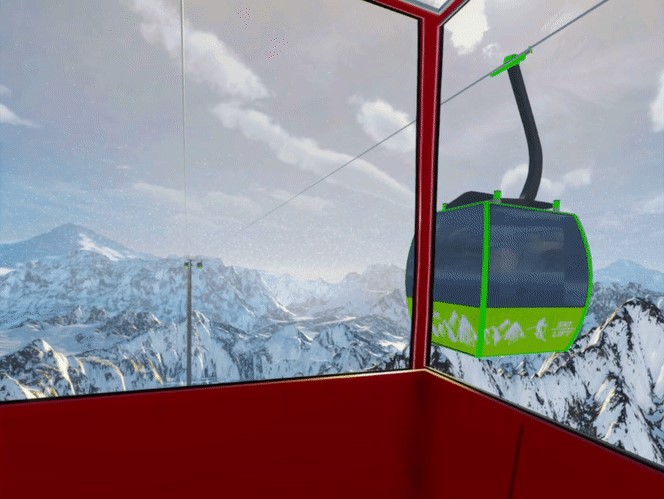
Image 2. A view from the cable car.
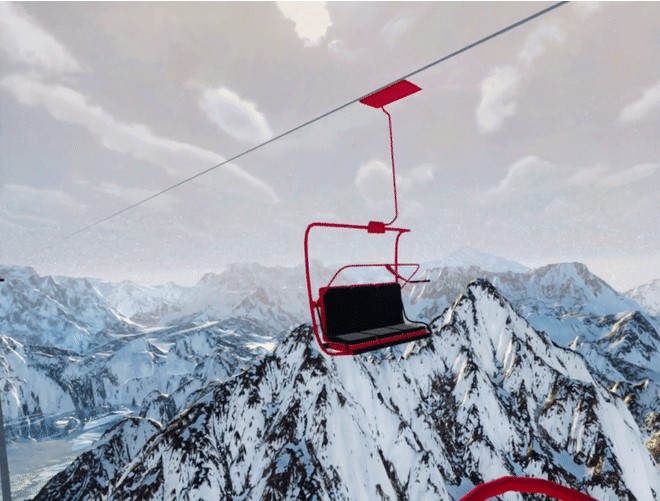
Image 3. A view from the cable chair.
This choice is vital to psychotherapists, to empirically verify their analysis through their initial questionnaires and interviews, as well as patients, to ascertain the same for themselves and confirm the heightened control that VRET provides them.
In our demo application both vehicles have the same movement functionality, so we only had to change the appearance of the vehicle across the scenes, depending on users’ choice. We did this using Player Preferences in Unity; the saved Player Preferences value remains the same across the application. The steps we followed were:
- Vehicle Selection screen
We created a Unity UI screen with two buttons, one for each vehicle. It’s always easier and advisable to create integer-constant variables to easily understand which one is selected.
public const int CABLECAR = 0;
public const int CHAIRCAR = 1;
public static string CARTYPE = "CARTYPE";
On selecting the cable car, the value is stored in Player Preferences.
PlayerPrefs.SetInt(CableCar.CARTYPE, CableCar.CABLECAR); PlayerPrefs.Save(); - Object hierarchy to accommodate both vehicles
We set the object hierarchy of the cable car containing both cars in one parent object, since both cars have the same functionality.
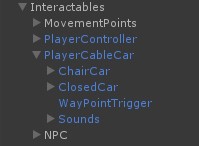
Image 4. Object hierarchy for the vehicles.Then, we set references to these objects in the Cable Car script.
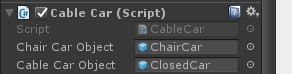
Image 5. The references set in the inspector. - Toggling visibility
Using the references given via the inspector, we can now toggle the visibility in the code.
carType = PlayerPrefs.GetInt(CARTYPE, CABLECAR);
void CarSelection()
    {
        switch(carType)
        {
            case CHAIRCAR:
                {
                    chairCarObject.SetActive(true);
                    cableCarObject.SetActive(false);
                }
                break;
            case CABLECAR:
                {
                    chairCarObject.SetActive(false);
                    cableCarObject.SetActive(true);
                }
                break;
        }
    }
So, using the simple Player Preferences feature, we allowed for the complete vehicle selection functionality along with reflecting the appropriate selection in the game scene.
Reference points
Here’s a chicken-and-egg problem to think about.
Anyone with a basic understanding of acrophobia knows two things:
- Everybody experiences some amount of fear at heights (yes, some may call it a thrill).
- Everybody overestimates distances, especially heights.
So, is it the phobia that makes acrophobes overestimate heights? Or, does overestimating heights cause the phobia?
For those of us for whom the second point is news, here’s a theory for the scientific community to consider and test: people possibly misinterpret heights to be more than they are, or vertical distances, because it’s safer to be mistaken; such a person would be extra careful. It’s called evolved navigation theory. It’s also generally proven that the error is bigger when looking downward. What differentiates an acrophobic from a non-acrophobic is usually how erroneous they are, and always the amount of fear they feel. One of the studies we referred to when designing this application was Imagery and Fear Influence Height Perception. It also attempts to answer the conundrum presented above.
One major lesson that our research validated for us, though, is that a reference point always helps make a closer estimate. This covers the second point presented above, while the VRET covers the first.
Given our application’s 3D environment, we included two references—the mountains around the cable and the cable poles.
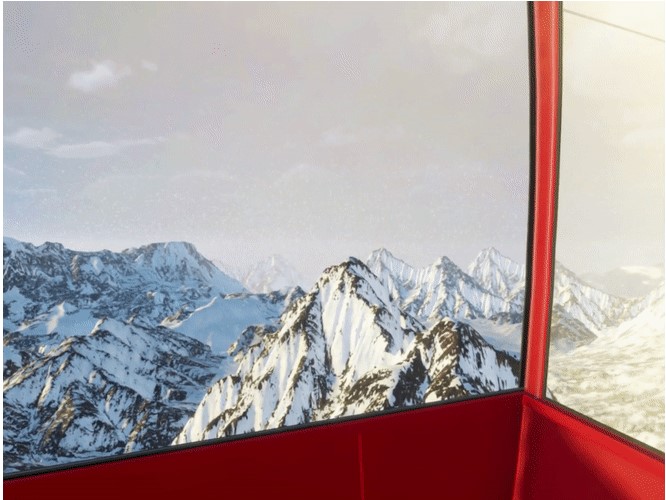
Image 6. A view of the mountains, serving as a long-range reference.
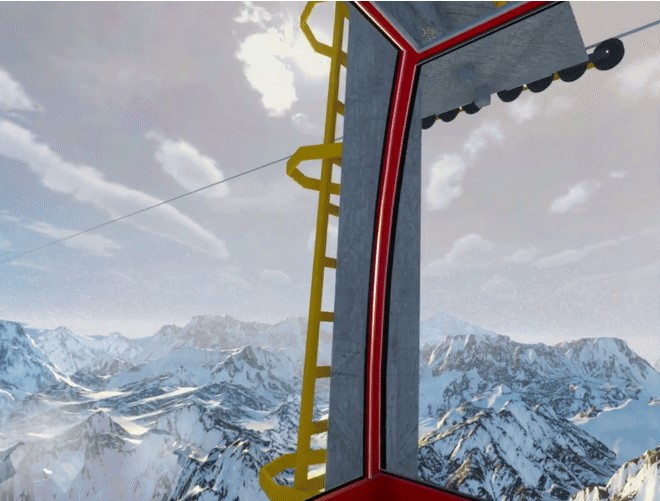
Image 7. A view of the cable poles, serving as a close-range reference.
To enable the application to run on a regular machine too, and based on our research we figured that visual detailing on far-off reference points do not help in estimating heights. So, we used 8K textures only on the mountains that are closest to the journey; all other models are 4K textures and below. On the point of realism, cable poles usually do not require a heavily detailed and qualitative texture; however, we went ahead with the 1K texture because the 8th generation Intel® Core™ i7 processor allows for such heavy-laden rendering.
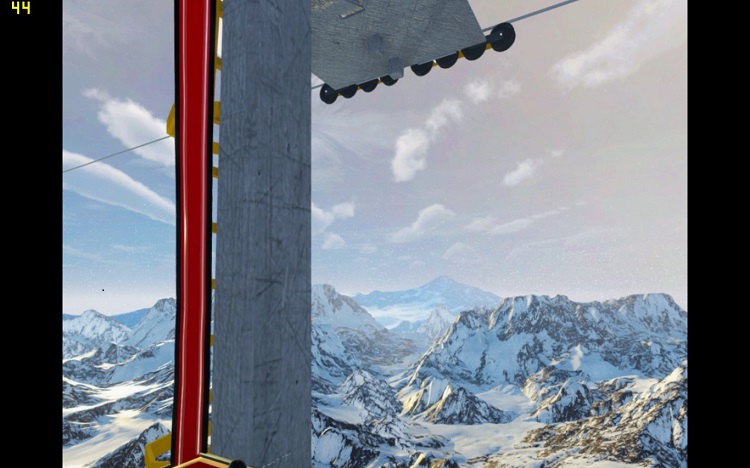
Image 8. 44 FPS, captured at one of the poles while in production.
A note on realism
These next two features contribute to realism. Speaking of which, we initially had a major design discussion regarding the extent of realism. Should it be cartoonish (some kind of play-way therapy), should it be minimalistic (imagine a white environment, with the only model being a white platform), or should it be pseudo-real?
The analogical, cartoonish approach may work for exposure therapy for phobias like arachnophobia (fear of spiders), glossophobia (fear of public speaking), or agoraphobia (fear of open spaces or crowds). Such therapies can be effectively gamified too, with a direct link to a user’s success as a player to his or her level of exposure.
The minimalistic approach may work for exposure therapy for phobias like aquaphobia (fear of water), hemophobia (fear of blood), or nyctophobia (fear of darkness). Such therapies have a single source of fear that’s independent of the situation; minimalism can independently target the source.
Acrophobia is more about the senses and so is dependent on a lot of environmental and situational stimuli. Moreover, an effective therapy for acrophobia requires a direct transferability of exposure to reality; hence, we chose this approach.
Real-time global illumination (GI) and shadows
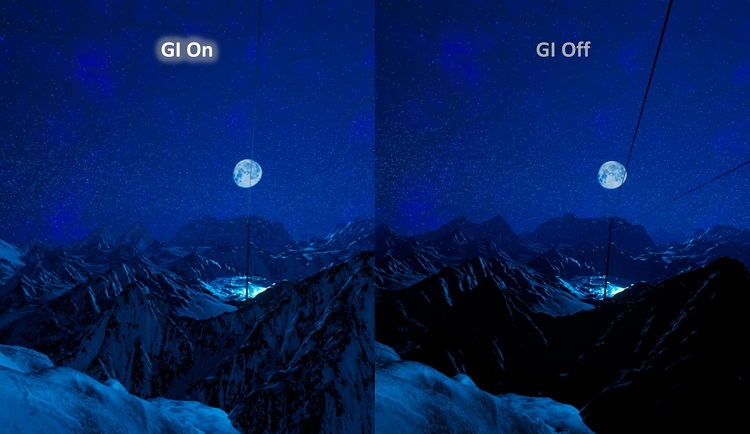
Image 9. A comparison of the value-add realtime GI.
GI is a technical system integrated in Unity Editor version 5.6.4f1 that precalculates the play of light—reflection and refraction and soft shadows—for both direct and indirect lighting. Since ours is a five-minute journey with many interesting environmental animations (for example, a helicopter flying by) and the Intel Core i7 processor with computing capabilities, the GI system helped us to instil a heavy sense of realism.
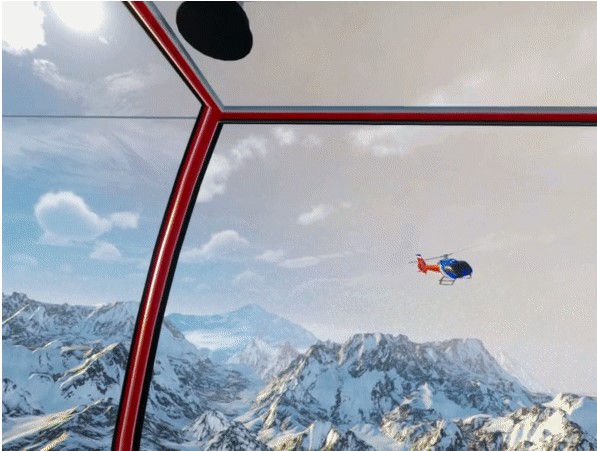
Image 10. Global illumination, as seen on an 8th generation Intel® Core™ i7 processor.
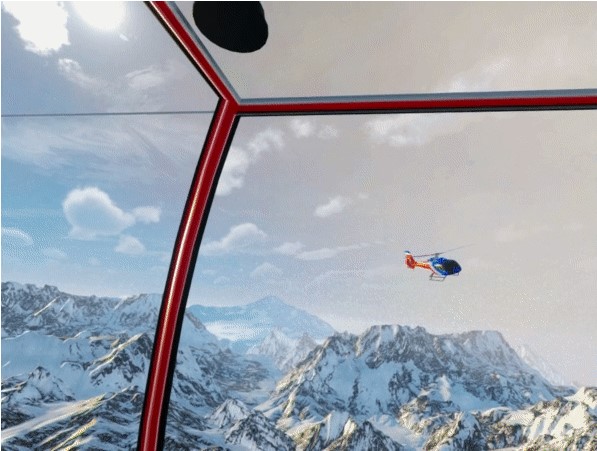
Image 11. Global illumination, as seen on a 6th generation Intel® Core™ i5 processor.
Unity has documented the entire built-in feature-set for GI.
Since our demo is one with limited navigational functionality, we achieved our targeted realism through a simple two-step process:
- Set-up precomputed lighting:
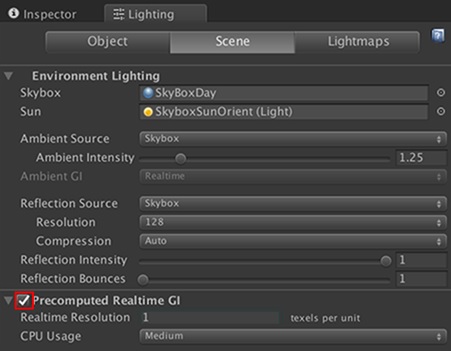
Image 12. Enabling the precomputed realtime GI lighting in Unity*.You can access the complete Unity manual on this.
- Define the lighting parameters through the lighting window:
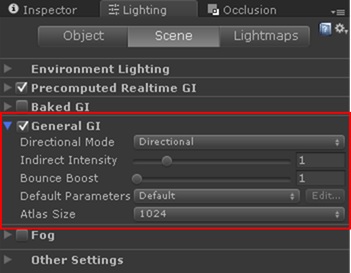
Image 13. The lighting window in Unity* where the parameters can be set.The Unity manual on the lighting window.
Real-time shadows are based on the real-time Lighting settings in Unity. Read a basic description of real-time lighting. This link also includes a note about precomputed lighting.
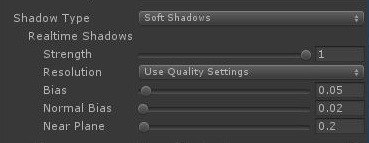
Image 14. Setting the Real-time Shadow parameters.When the real-time lights are enabled, the Real-time Shadows parameters can be adjusted to the requirements.
Particle effects and physics
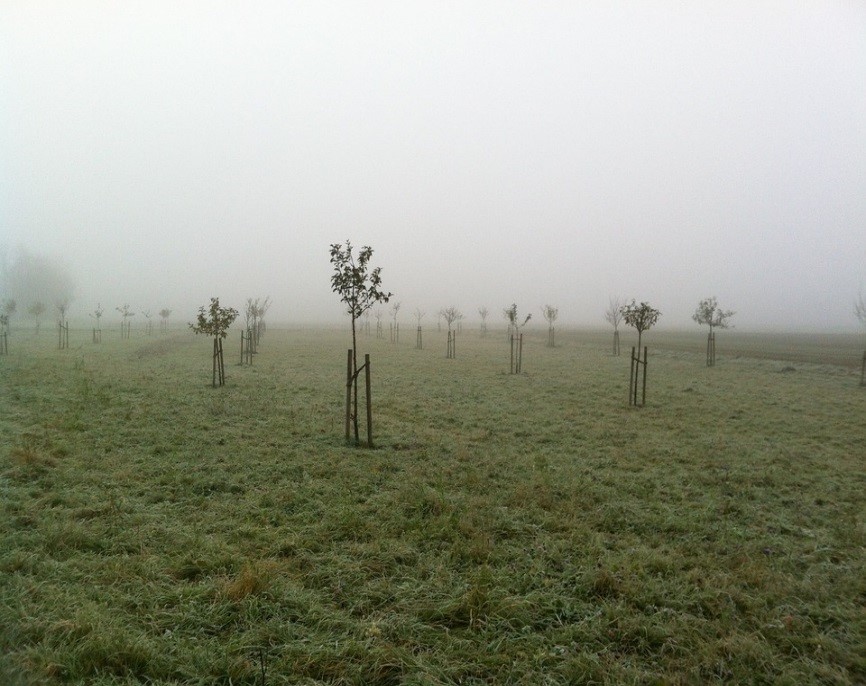
Image 15. Enhanced depth perception due to the Rayleigh effect with fog.
The more cues an individual is provided, the closer to reality his or her estimation will be. When it comes to depth perception we felt that adding volumetric fog and mist would work as a good cue for an acrophobe in VRET. This was also one of the major influencers in our decision to choose a snow-clad environment.
Another decision we made toward achieving realism was is to import all models true to scale (T2S), including a terrain of about 20 km2.
| Component | Poly Count |
|---|---|
| Terrain | 888,340 |
| Cable Pillars | 63,252 |
| Floating Ice | 1,315 |
| Stairs | 2,016 |
| Light Poles | 1,520 |
| Cable Car Lines | 334,400 |
| Total | 1,290,843 |
Table 1. Polygon count of the demo model.
T2S models are usually known to enhance the visual definition due to the polygon count, at the cost of impacting the load. Adding to that, all of our textures were 4k and above, with two textures up to 8k.
To implement the Rayleigh effect efficiently we covered the entire model with volumetric fog and mist: To put a value to it, it’s 1k particles covering about 20 km2. Similarly, for the volumetric snow that covers the entire model, the number of particles was 10 million.
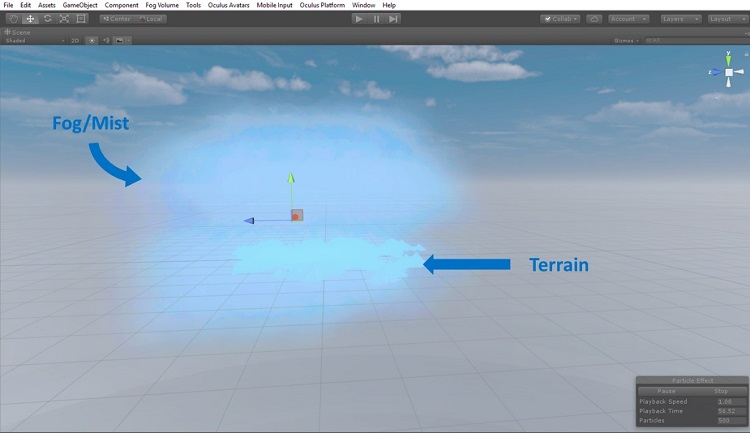
Image 16. The particle system enveloping the entire terrain.
Our CPU executed this decision in less than a minute, including experimenting with the particle count (we pumped it up to 100 million), color, and the time duration.
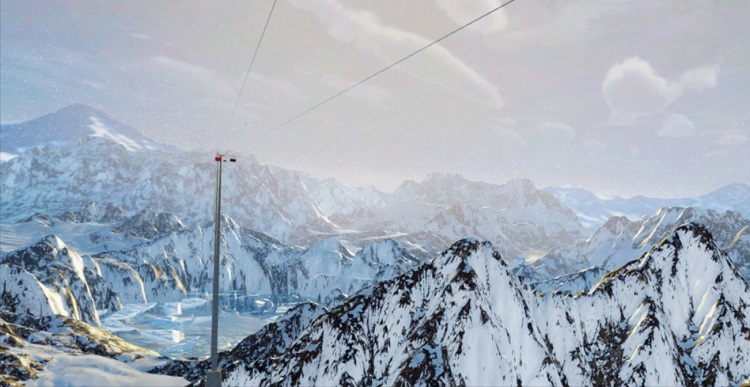
Image 17. The final effect, as viewed in this monocular image (VR is binocular).
Out of all the CPU usage of the application (which is around 33 percent, or four cores), the entire particle system used about 60 percent. Clearly, an 8th generation Intel Core i7 processor or higher is necessary to support such particle effects.
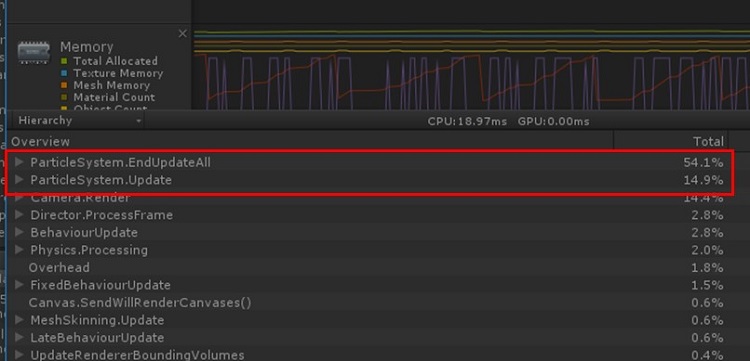
Image 18. The particle system's CPU load, as seen in the Unity* Profiler.
Moral of the Adventure
The demo application provided us with insight into how it would be to develop a full-fledged VRET application. First, we realized that the expanse of the location makes a marked difference in the experience, both directly and indirectly. Let’s take this on with an analogy.
Jane just moved jobs to a Fortune 500 company; however, she’s considering rejecting the job. Traveling the metro to the office, especially when it goes over rivers, triggers her acrophobia. It was with great difficulty that she managed to convince the new office to provide her with space on a lower floor, but they have yet to confirm it. Designing a VRET for Jane’s requirements would do well with an expansive cityscape terrain. Indirectly, it would allow for more scope of detailed models, FX, and systems that confirm realism and work as effective referral points.
Next, we had it easy, since we were developing a demo application. A complete VRET application not only has multiple expansive environments, but also each has around ten grades of exposure (and not necessarily just sequentially differentiating the heights, as we’ve amply demonstrated in our application).
Finally, a good VRET provides the psychotherapist complete control as well as features that read the user’s stress levels. With the onslaught of smartwatches and wristbands it isn’t too farfetched to consider incorporating their SDKs with the application communicating the readings to the therapist.
That would mean most use case considerations end up being formulaic and/or technical. Though some of the realism can be moved to a graphics processing unit (GPU), it is important to note that not all psychotherapists or their patients may own a high-end PC with a gaming graphics card. A good VRET will run on a regular PC without one, or a not very good GPU.
The Oculus Rift and Touch require a gaming graphics card as of writing this article. However, we are sure it is only a matter of time until the general standards of processors will evolve and VR device manufacturers can work with regular graphics cards.
On a more personal note, a quick reading of the pilot study tells you the limited computing capacities of the time. These limitations don’t apply today, and a modern VRET should reflect this.
About the Author
Jeffrey Neelankavil is a communications design and technologies enthusiast. His interests in VR technologies are commercial application VR.
"